Toyota Highlander Service Manual: Overhaul
HINT:
- COMPONENTS: See page 65-9
- Use the same procedures for the RH side and LH side.
- The procedures listed below are for the LH side.
- Installation is in the reverse order of removal.
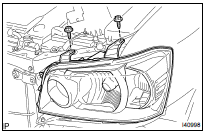
1. REMOVE RADIATOR GRILLE (SEE PAGE 76-2 )
2. REMOVE FRONT FENDER SPLASH SHIELD SUB-ASSY LH (SEE PAGE 76-2 )
3. REMOVE FRONT FENDER SPLASH SHIELD SUB-ASSY RH (SEE PAGE 76-2 )
4. REMOVE FRONT BUMPER COVER (SEE PAGE 76-2 )
5. REMOVE LH HEADLAMP ASSY
(a) Remove the 2 screws.
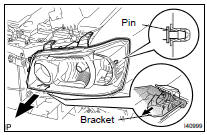
(b) Pull out the LH headlamp assy forward, then release the pin and the headlamp bracket.
(c) Disconnect the connectors, and remove the LH head lamp assy.
6. REMOVE HEADLAMP, NO.1 BULB
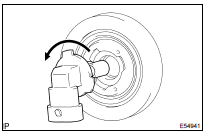
(a) Remove the headlamp, No.1 bulb as shown in the illustration.
7. REMOVE HEADLAMP, NO.2 BULB
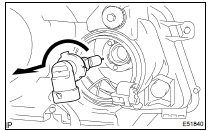
(a) Remove the headlamp, No.2 bulb as shown in the illustration.
8. REMOVE CLEARANCE LAMP BULB
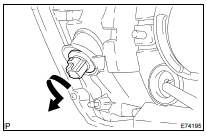
(a) Remove the clearance lamp bulb and the socket as shown in the illustration.
(b) Remove the clearance lamp bulb from the socket as shown in the illustration.
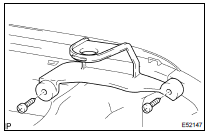
9. REMOVE CLEARANCE LAMP SOCKET & WIRE
10. REMOVE HEADLAMP UNIT LH
11. INSTALL HEADLAMP PROTECTOR RETAINER UPPER LH
HINT: To minimize damage to the headlamp unit in case of a collision, the stays for the headlamp unit have been constructed to break off. The stays are available as supply parts for low-cost repair.
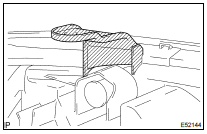
(a) Cut off the part shaded in the illustration and sand smooth with sandpaper.
NOTICE: After cutting off the part, place the headlamp protector retainer upper LH against the bosses and gradually file away until installation is possible.
(b) Install the headlamp protector retainer upper LH with the 2 screws.
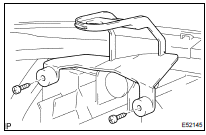
12. INSTALL HEADLAMP PROTECTOR RETAINER LWR LH
HINT: To minimize damage to the headlamp unit in case of a collision, the stays for the headlamp unit have been constructed to break off. The stays are available as supply parts for low-cost repair.
(a) Cut off the part shaded in the illustration and sand smooth with sandpaper.
NOTICE: After cutting off the part, place the headlamp protector retainer LWR LH against the bosses and gradually file away until installation is possible.
(b) Install the headlamp protector retainer LWR LH with the 2 screws.
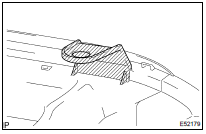
13. INSTALL HEADLAMP BRACKET LWR LH
HINT: To minimize damage to the headlamp unit in case of a collision, the stays for the headlamp unit have been constructed to break off. The stays are available as supply parts for low-cost repair.

(a) Cut off the part shaded in the illustration and sand smooth with sandpaper.
NOTICE: After cutting off the part, place the headlamp bracket LWR LH against the bosses and gradually file away until installation is possible.
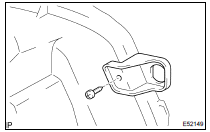
(b) Install the headlamp bracket LWR LH with the screw.
14. VEHICLE PREPARATION FOR HEADLAMP AIM ADJUSTMENT (SEE PAGE 65-14 )
15. PREPARATION FOR HEADLAMP AIMING (Using a screen) (SEE PAGE 65-14 )
16. HEADLAMP AIMING INSPECTION (SEE PAGE 65-14 )
17. HEADLAMP AIMING ADJUSTMENT (SEE PAGE 65-14 )
 LH headlamp ASSY
COMPONENTS
...
 Adjustment
1. VEHICLE PREPARATION FOR HEADLAMP AIM ADJUSTMENT
(a) Prepare the vehicle:
Ensure there is no damage or deformation to the body around the
headlamps.
Fill the fuel tank.
Make sure that th ...
More about Toyota Highlander:
The keys
The following keys are provided with the vehicle.
vehicles without a smart key system
master keys
operating the wireless remote control
function
Valet key
key number plate
Vehicles with a smart key system
electronic keys
operating the smart key syst ...
