Toyota Highlander Owners Manual: Replacing light bulbs
Headlight low beams
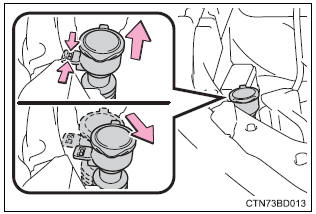
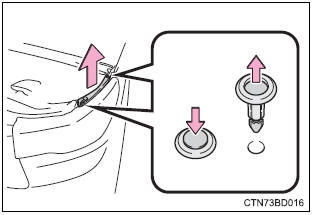
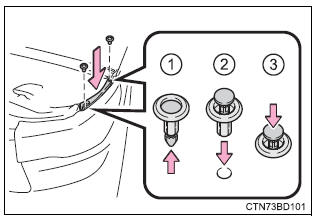
- For the right side only: remove the washer fluid tank opening.
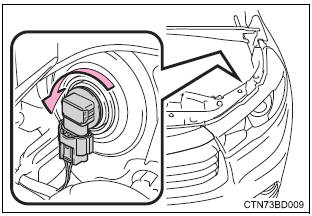
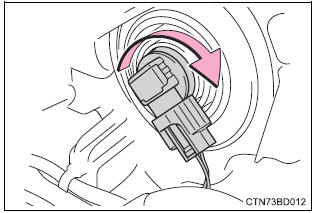
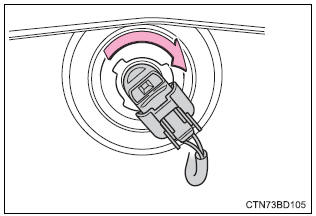
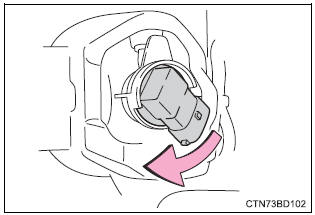
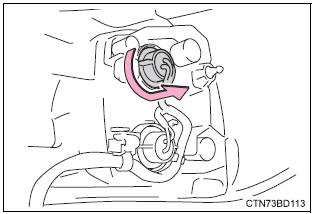
- Turn the bulb base counterclockwise.
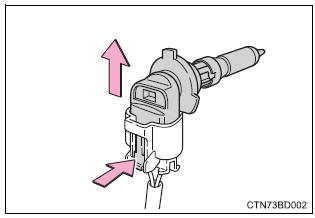
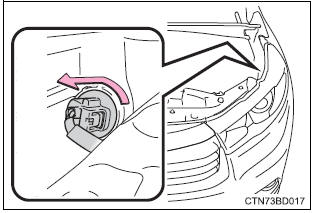
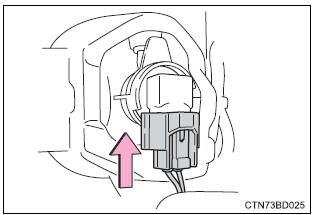
- Unplug the connector while pressing the lock release.
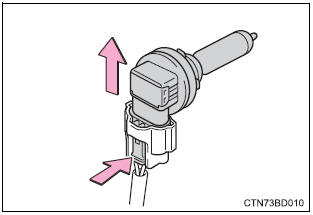
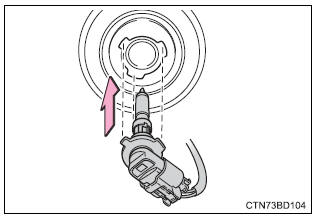
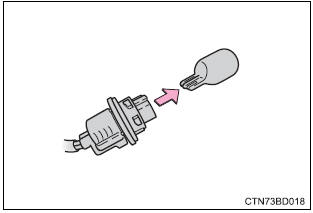
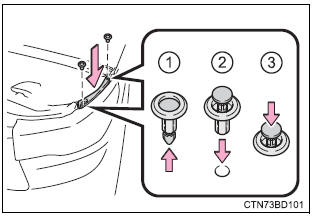
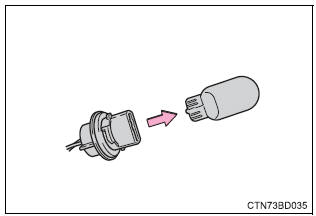
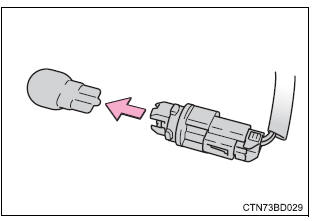
- Replace the light bulb, and
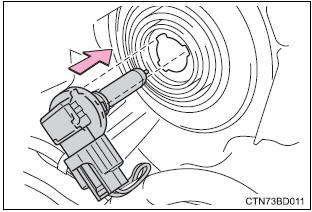
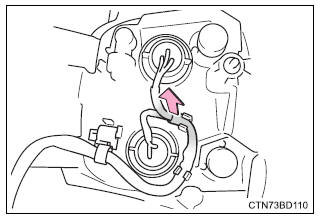
install the bulb base.
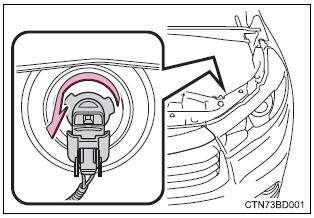
Align the 3 tabs on the light bulb with the mounting and insert.
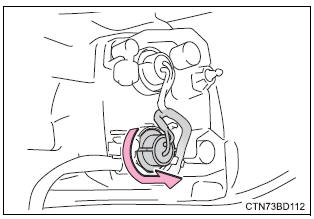
- Turn and secure the bulb
base.
Shake the bulb base gently to check that it is not loose, turn the headlight low beams on once and visually confirm that no light is leaking through the mounting.
- For the right side only: install the washer fluid tank.
Headlight high beams/daytime running lights
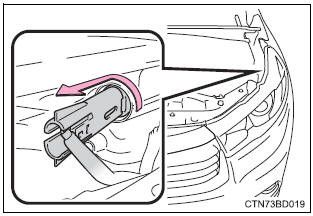
- Turn the bulb base counterclockwise.
- Unplug the connector while pressing the lock release.
- Replace the light bulb, and
install the bulb base.
Align the 3 tabs on the light bulb with the mounting, and insert.
- Turn and secure the bulb
base.
Shake the bulb base gently to check that it is not loose, turn the headlights on once and visually confirm that no light is leaking through the mounting.
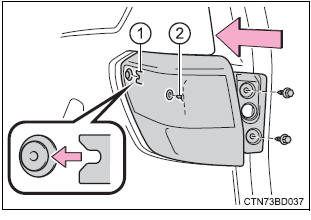
Front turn signal lights/parking lights
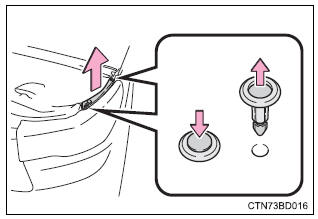
- Remove the 2 clips and remove the side cover.
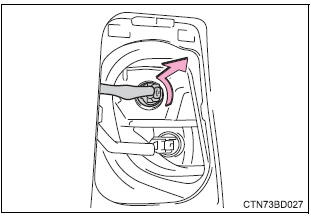
- Turn the bulb base counterclockwise.
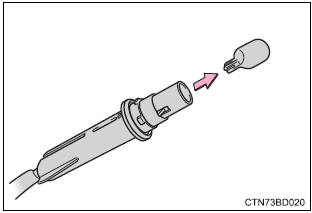
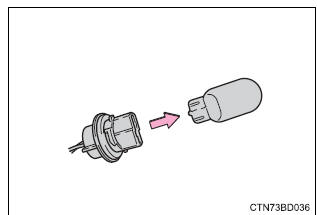
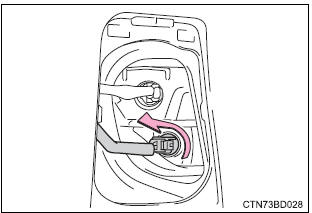
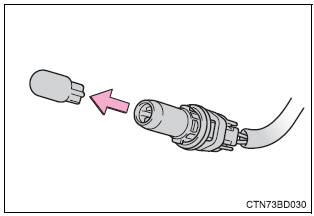
- Remove the light bulb.
- Install by conducting 3 and 2 with the directions reversed.
- Install the side cover and then install the 2 clips.
Front side marker lights
- Remove the 2 clips and remove the side cover.
- Turn the bulb base counterclockwise.
- Remove the light bulb.
- Install by conducting 2 and 3 with the directions reversed.
- Install the side cover and then install the 2 clips.
Front fog lights (if equipped)
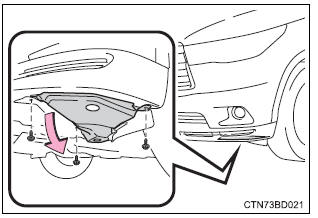
- Remove the 3 screws and partly remove the fender liner.
- Unplug the connector while pressing the lock release.
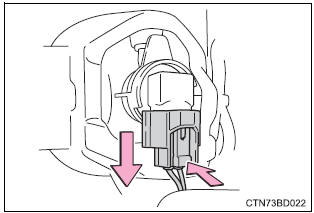
- Turn the bulb base counterclockwise.

- Install a new light bulb.
Align the 3 tabs on the light bulb with the mounting and insert.
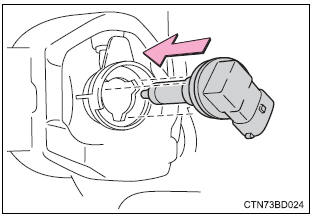
- Turn clockwise and secure the bulb base.
- Install the connector.
Shake the connector gently to check that it is not loose, turn the front fog lights on once and visually confirm that no light is leaking through the mounting.
- When installing the fender liner, install by conducting with the
directions reversed.
Make sure that the fender liner is attached to the inside of the bumper.
Stop/tail lights and rear side marker lights, and rear turn signal lights
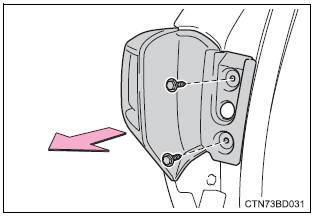
- Open the back door and remove the 2 screws, and remove the lamp assembly by pulling it directly backward from the rear of the vehicle.
- Remove the wire harness.
- Turn the bulb base counterclockwise.
- Stop/tail lights and rear side marker lights
- Rear turn signal lights
- Remove the light bulb.
- Stop/tail lights and rear side marker lights
- Rear turn signal light
- When installing the light bulb, install by conducting 4, 3 and 2 with the directions reversed.
- Install the lamp assembly
and then install the 2 screws.
Align the guide (1 ) and pin (2 ) on the lamp assembly with the mounting when installing it.
Tail lights and back-up lights
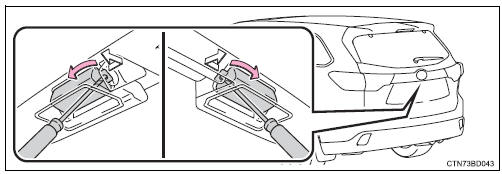
- Open the back door and
remove the cover.
Insert a flathead screwdriver or similar into the hole at the top of the cover and remove it as shown in the illustration.
To prevent damaging the vehicle, wrap the flathead screwdriver with a tape.
- Turn the bulb base counterclockwise.

- Tail lights
- Back-up lights
- Remove the light bulb
- Tail lights
- Back-up lights
- When installing, reverse the steps listed
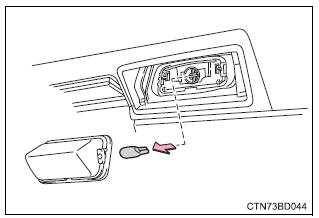
License plate lights
- Remove the lens.
Insert a properly sized screwdriver into the hole of the lens on the inner side and disengage the claw and pry the lens toward the outer side as shown in the illustration.
To prevent damaging the vehicle, wrap the tip of the screwdriver with tape.
- Remove the light bulb.
- When installing, reverse the steps listed.
Replacing the following bulbs
If any of the lights listed below has burnt out, have it replaced by your toyota dealer.
- Side turn signal lights
- daytime running lights (led type)
- high mounted stoplight
- outer foot lights (if equipped)
Led light bulbs
The side turn signal lights, daytime running lights (led type), high mounted stoplight and outer foot lights (if equipped) consist of a number of leds. If any of the leds burns out, take your vehicle to your toyota dealer to have the light replaced.
Condensation build-up on the inside of the lens
Temporary condensation build-up on the inside of the headlight lens does not indicate a malfunction.
Contact your toyota dealer for more information in the following situations:
- large drops of water have built up on the inside of the lens.
- Water has built up inside the headlight.
When replacing light bulbs
 Warning Warning
To prevent damage or fire Make sure bulbs are fully seated and locked. |
 Bulb locations
Front
Headlight high beam/daytime
running light
Headlight low beam
Front fog light (if equipped)
Front turn signal light/parking
light
Front side marker light
Rear
Tail ligh ...

More about Toyota Highlander:
Moving a second seat for third seat access
Getting in the vehicle
Pull the lever and tilt the seatback
forward.
Move the seat to the front-most
position.
Getting out of the vehicle
Pull the lever on the side of the
seatback and tilt the seatback
forward.
Move the seat to the front-most
position.
After passengers have e ...
