Toyota Highlander Service Manual: ECM (2AZ-FE)
REPLACEMENT
1. DISCONNECT BATTERY NEGATIVE TERMINAL
2. REMOVE FRONT DOOR SCUFF PLATE RH (See page 71-10 )
3. REMOVE COWL SIDE TRIM SUB-ASSY RH (See page 71-10 )
4. REMOVE GLOVE COMPARTMENT DOOR ASSY (See page 71-10 )
5. REMOVE INSTRUMENT PANEL FINISH PANEL LOWER NO.2 (See page 71-10 )
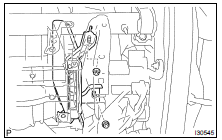
6. REMOVE ECM
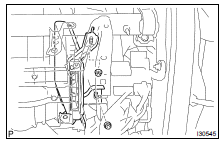
(a) Remove the 2 wire harness clamps.
(b) Disconnect the 5 ECM connectors.
(c) Remove the 2 nuts and ECM.
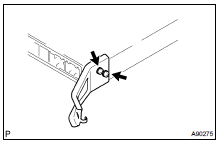
7. REMOVE ECM BRACKET NO. 1
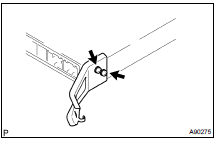
(a) Remove the 2 screws and ECM bracket.
8. REMOVE ECM BRACKET NO. 2
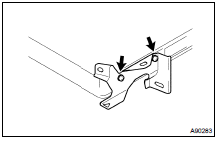
(a) Remove the 2 screws and ECM bracket.
9. INSTALL ECM BRACKET NO. 2
(a) Install the ECM bracket with the 2 screws.
10. INSTALL ECM BRACKET NO. 1
(a) Install the ECM bracket with the 2 screws.
11. INSTALL ECM
(a) Install the 2 wire harness clamps.
(b) Connect the 5 ECM connectors.
(c) Install the ECM with the 2 nuts.
Torque: 5.5 NVm (56 kgfVcm, 49 in.Vlbf)
12. INSTALL INSTRUMENT PANEL FINISH PANEL LOWER NO.2 (See page 71-10 )
13. INSTALL GLOVE COMPARTMENT DOOR ASSY (See page 71-10 )
14. INSTALL COWL SIDE TRIM SUB-ASSY RH (See page 71-10 )
15. INSTALL FRONT DOOR SCUFF PLATE RH (See page 71-10 )
16. CONNECT BATTERY NEGATIVE TERMINAL
 Knock sensor (2AZ-FE)
REPLACEMENT
1. DRAIN ENGINE COOLANT (See page 16-6 )
2. REMOVE AIR CLEANER CAP WITH AIR CLEANER HOSE (See page 14-24 )
3. REMOVE THROTTLE BODY ASSY (See page 10-6 )
4. REMOVE INTAKE MANIFOLD
...
 Accelerator pedal rod ASSY (2AZ-FE)
REPLACEMENT
1. REMOVE ACCELERATOR PEDAL ROD ASSY
(a) Disconnect the accelerator pedal position sensor connector.
(b) Remove the 2 bolts and pedal rod.
2. INSTALL ACCELERATOR PEDAL ROD ASSY
(a ...
More about Toyota Highlander:
Side table (if equipped)
Fold the side table up for use.
To stowing the side table
To fold down the side table, pull up the
lever to release the lock. Hold the table to
let it lower slowly until you hear a click.
Warning
When not in use, store the side table at the fully lowered position.
...
